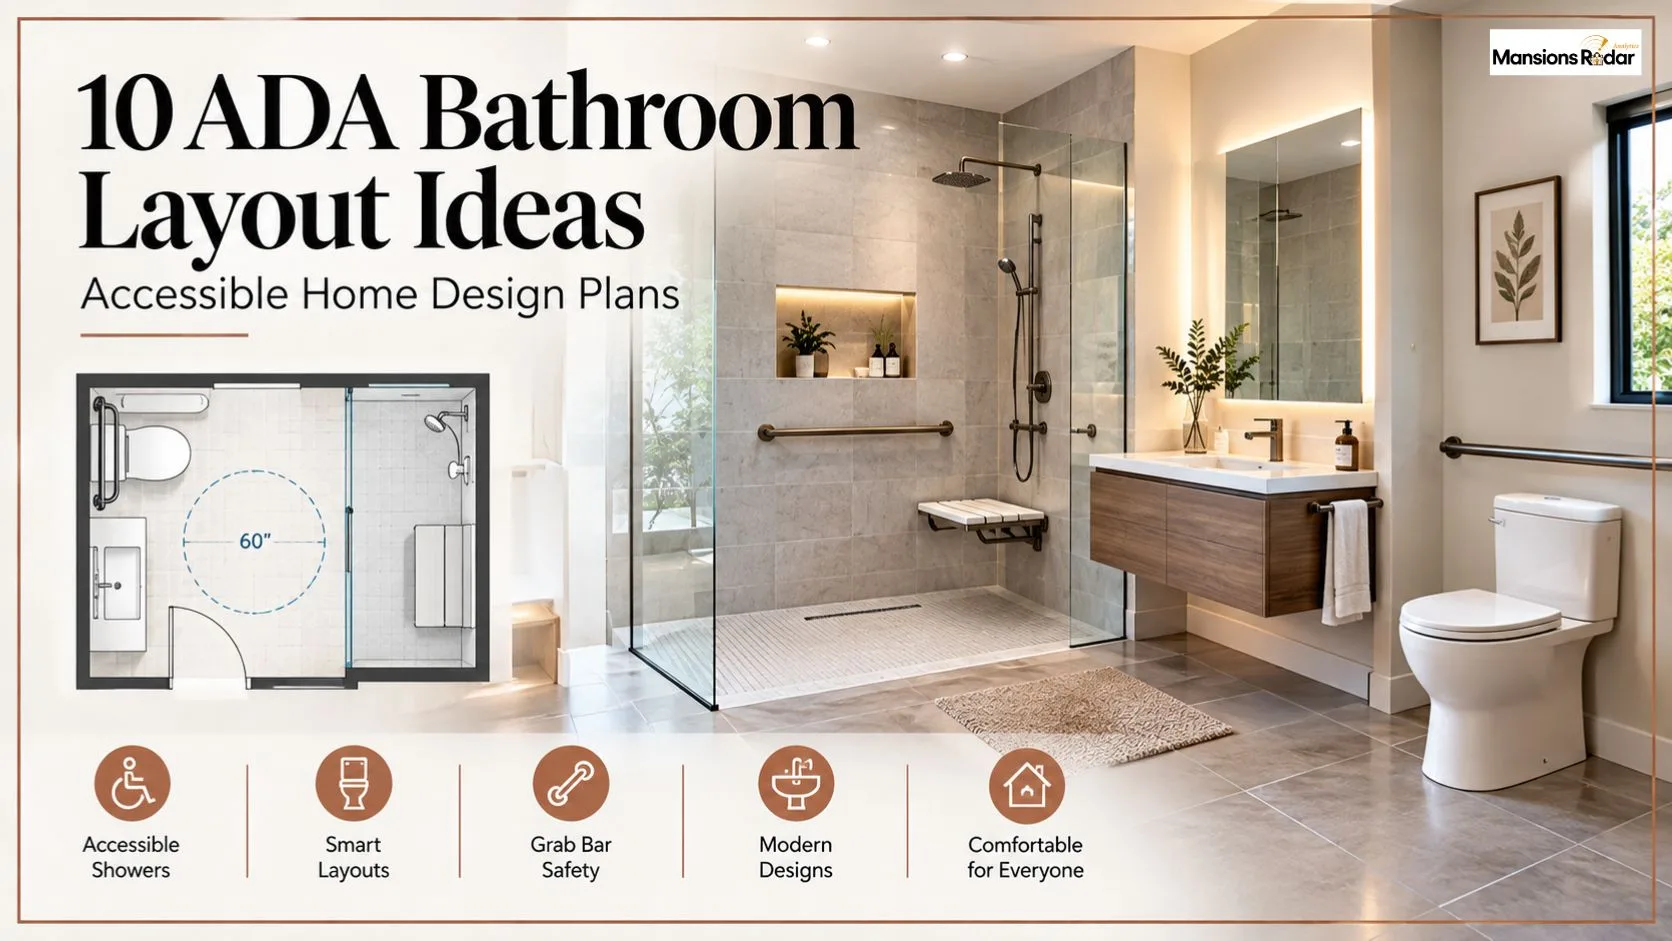
An accessible bathroom starts with the floor plan. The right layout keeps movement paths clear, puts fixtures within easy reach, and removes barriers at the shower, toilet, and sink. Falls are the leading cause of injury-related death for adults over 65 in the United States, according to CDC data. A well-planned accessible bathroom directly reduces that risk every single day.
These 10 ADA bathroom layout ideas apply accessible design principles to real homes. Each one focuses on practical fixture placement, clear movement paths, and modern design that feels warm and comfortable rather than clinical.
What Is an ADA Bathroom Layout
The ADA mainly covers public and commercial facilities, not private homes. Still, its accessibility principles can help guide residential bathroom design.
Many homeowners use these ideas when planning for aging in place, improving mobility, and creating a safer bathroom that remains comfortable and practical for everyone over time.
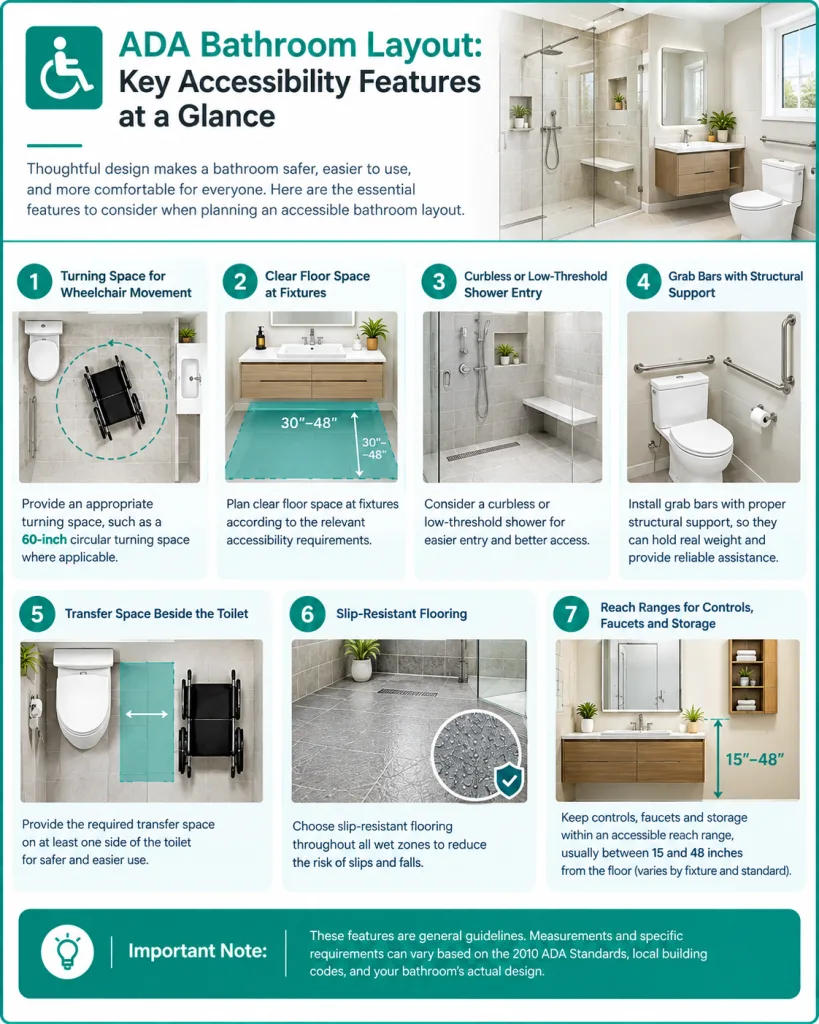
An accessible bathroom layout includes:
- Clear routes between the entrance and every fixture
- A 60-inch diameter turning circle for wheelchair movement
- A 30-by-48-inch clear floor space rectangle for fixture approach
- Adequate maneuvering and transfer space throughout the room
- Accessible sink with knee clearance where needed
- Low or curbless shower entry with easy-to-reach controls
- Open toilet transfer space on at least one side
- Proper door clearance and swing direction
- Grab bars mounted into structural wall backing
- Slip-resistant flooring with smooth surface transitions
- Storage within reach without blocking movement paths
Verify all dimensions against the 2010 ADA Standards for Accessible Design and local building requirements before finalizing any plan.
10 ADA Bathroom Layout Ideas for Modern Homes
A well-planned accessible bathroom supports easy movement without feeling clinical or institutional. These layout ideas combine practical fixture placement with comfortable, modern design.
1. Open ADA Bathroom Layout With a Walk-In Shower
Pull the vanity to one wall. Position the toilet on the adjacent wall. Place a curbless walk-in shower at the far end, with a fixed glass panel to control water. Mount shower controls between 38 and 48 inches from the floor.
Add a handheld showerhead on a vertical bar and a built-in bench on the shower side wall. Keep a 30-by-48-inch clear floor space in front of the shower entry.
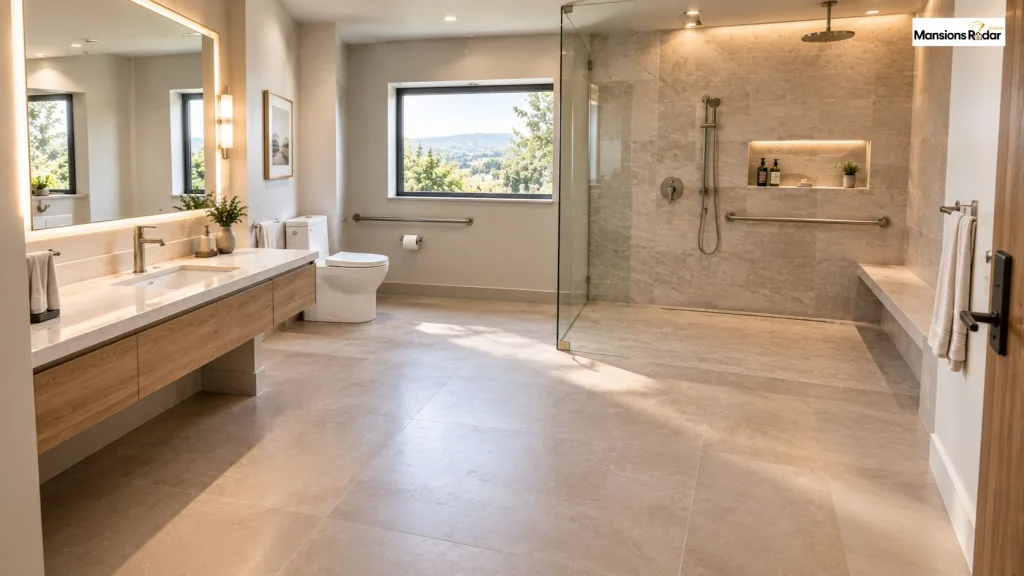
Best for: Spacious primary bathrooms and full accessible renovations.
Tip: Build a recessed shower niche during construction to keep products off the floor and out of the movement path.
2. Small ADA Bathroom With Smart Fixture Placement
Use a compact wall-mounted vanity that leaves clear floor space and a 30-by-48-inch approach rectangle underneath. Position the toilet on the wall with the most open transfer space.
Replace an inward-swinging door with a sliding or pocket door. Keep the route from the door to each fixture completely clear of freestanding storage.
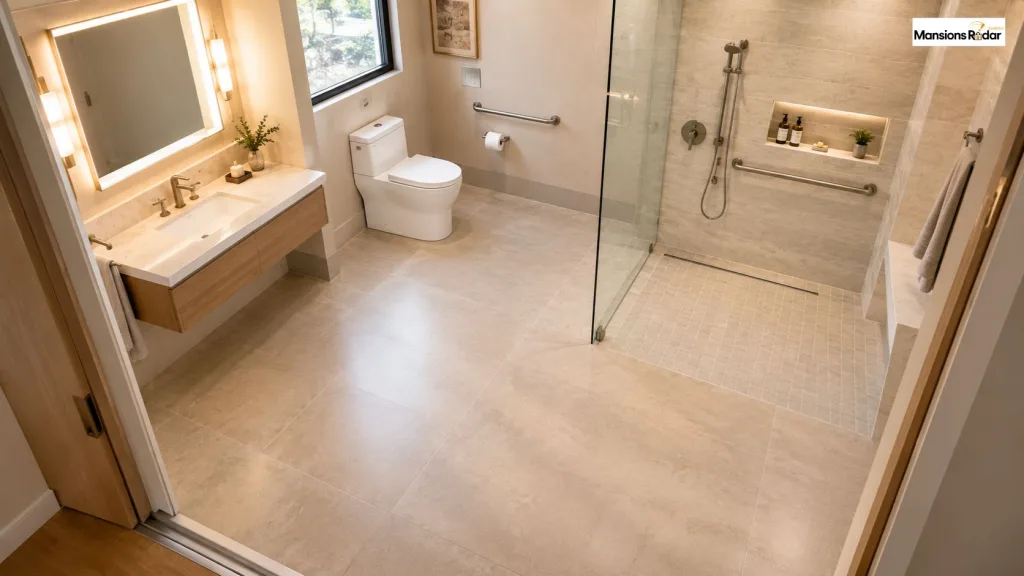
Best for: Small bathrooms and apartment renovations where floor space is limited.
Tip: Wall-mounted fixtures and recessed niches preserve clear floor space without sacrificing any function.
3. ADA Bathroom Layout With a Roll-In Shower
A roll-in shower has a level entry with no curb. A wheelchair rolls directly into the shower zone. Install a fold-down bench on the side wall, grab bars on the shower walls with structural backing, and a linear drain along one wall.
The single-direction floor slope makes wheelchair movement through the wet zone more stable and easier to manage.
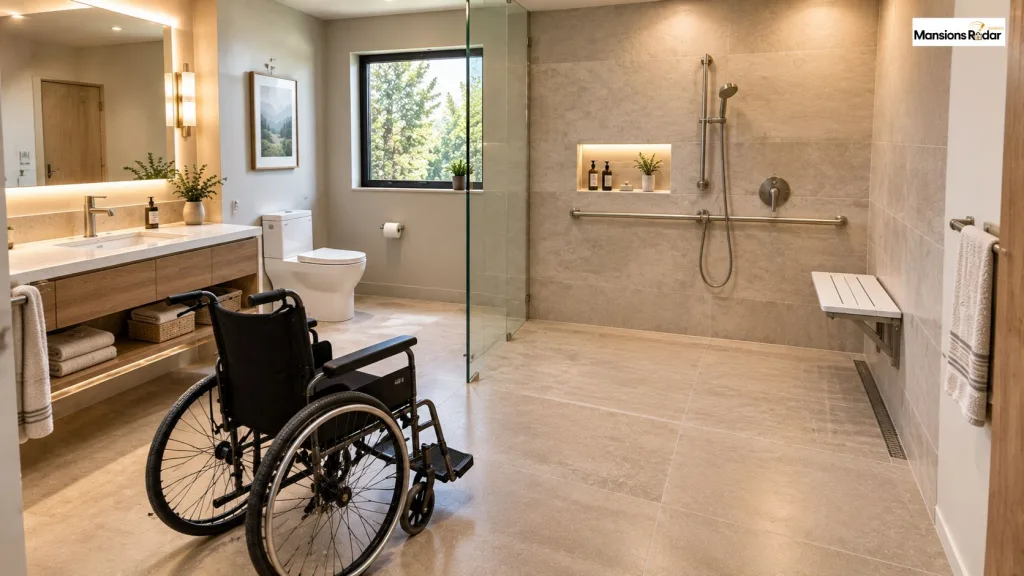
Best for: Wheelchair users who need direct, barrier-free shower access.
Tip: Waterproof the full wet zone floor and walls before tiling. Check local code for drainage configuration requirements.
4. ADA Bathroom Layout With a Floating Vanity
Mount the vanity to the wall with clear knee and toe space underneath. Keep the sink rim between 34 and 36 inches from the floor. Cover or insulate the pipes beneath to protect the user’s legs from hot supply lines. Choose lever faucets throughout.
Mount the mirror with its bottom edge no higher than 40 inches from the floor so a seated user sees their full reflection.
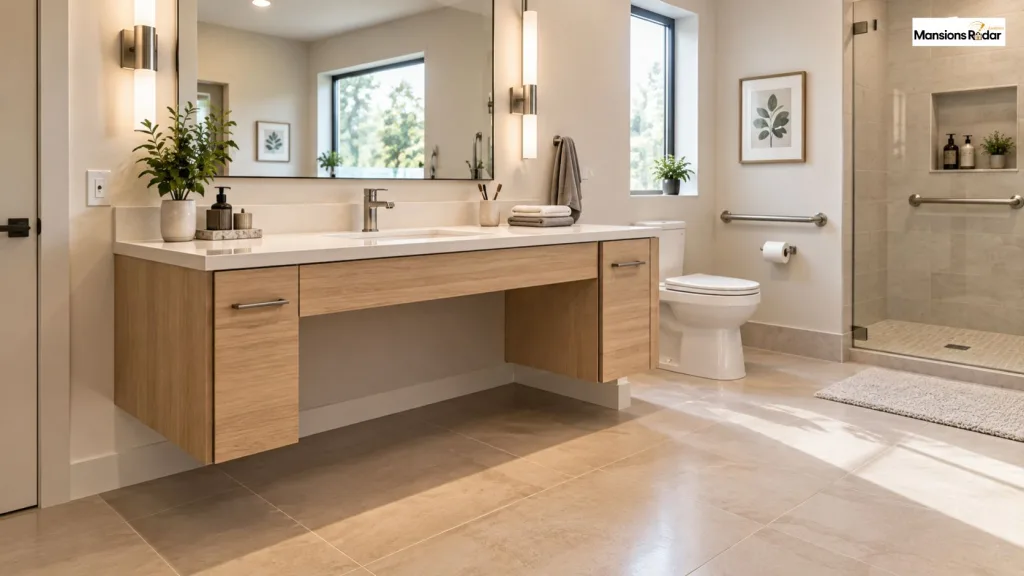
Best for: Modern bathrooms that need accessible sink access for seated users.
Tip: Add concealed storage in the vanity body above the knee clearance zone to keep countertops clear.
5. ADA Bathroom Layout With a Separate Toilet Zone
Create a distinct toilet zone with open side transfer space of at least 60 inches from the side wall to allow wheelchair positioning. Keep the approach path wide and straight. Mount a side grab bar for transfer support and a rear bar for push-up support.
Install both into structural backing behind the wall surface. Avoid partitions that narrow the entry to less than 32 inches.
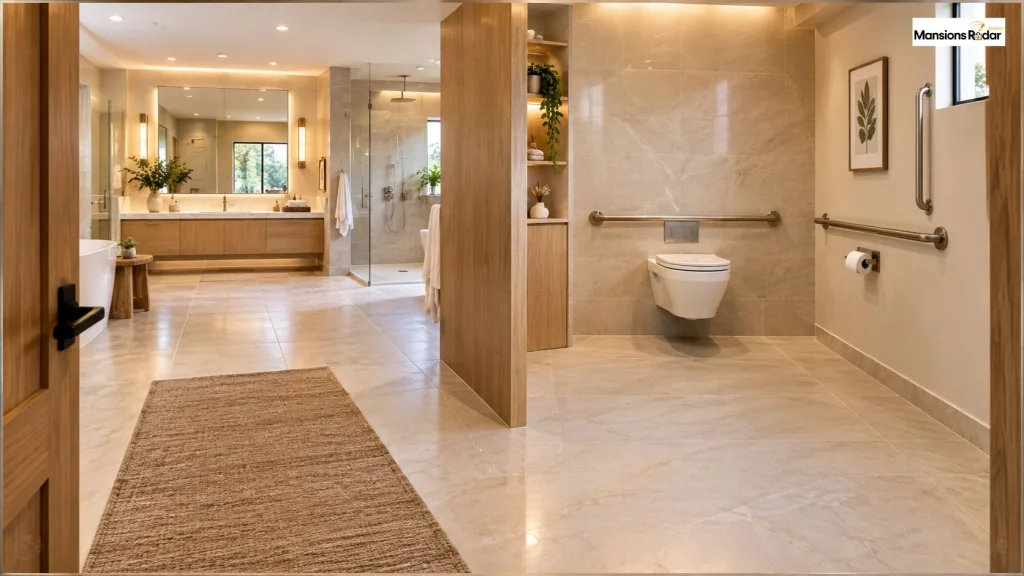
Best for: Larger primary bathrooms and shared accessible bathrooms.
Tip: Keep the toilet zone entry wide and the approach path straight so no angled wheelchair entry is required.
6. ADA Bathroom Layout With a Freestanding Tub
A freestanding tub creates access challenges in an accessible bathroom. It has no wall support for grab bars and often sits too high for safe independent transfer. Position it away from the main movement route. Keep at least 24 inches of clear transfer space on the approach side.
Add a freestanding grab bar beside the tub entry. Treat the shower as the primary accessible bathing fixture.
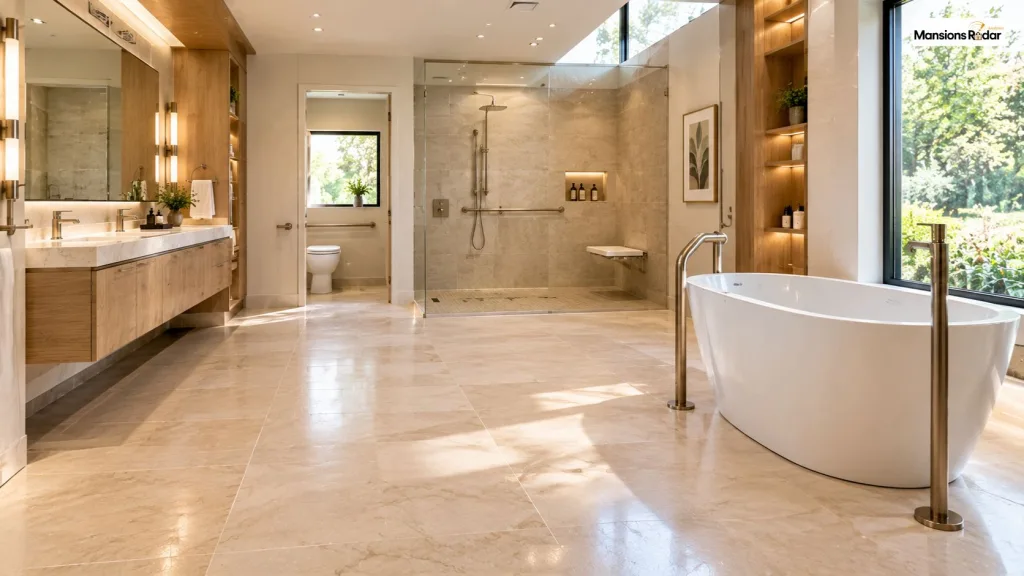
Best for: Homeowners who want a tub without compromising the main accessible movement route.
Tip: A walk-in tub is a safer alternative for users who cannot manage a standard tub entry independently.
7. ADA Bathroom Layout With a Walk-In Tub and Shower
A walk-in tub has a side-entry door that removes the step-over barrier of a standard tub. Position it on the same wall as the shower or the adjacent wall so both share one wet zone.
Keep 30 by 48 inches of clear transfer space open on the door side. Choose a model with a built-in seat, grab bars on both sides, and controls within easy seated reach.
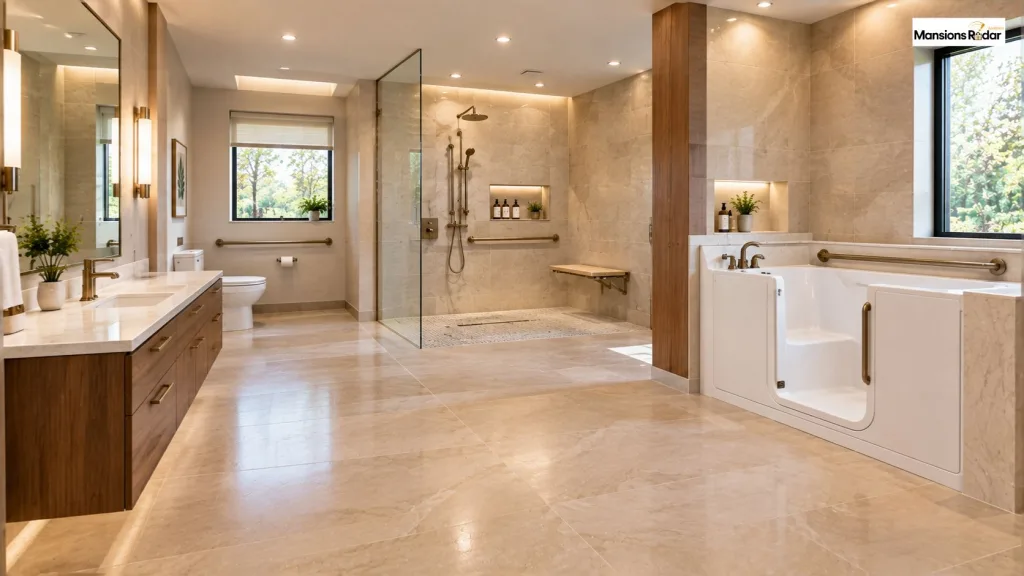
Best for: Bathrooms designed around bathing assistance and easier tub access.
Tip: Use professional waterproofing around the tub door seal where water pressure is highest during each use.
8. L-Shaped ADA Bathroom Layout for Better Movement
Place the vanity and toilet along one wall. Position the shower along the adjacent wall. The inside corner creates a natural 60-inch turning point for wheelchair movement.
Keep that corner completely clear. Separate the wet and dry zones across the two walls to simplify drainage and reduce splash reaching the vanity area.
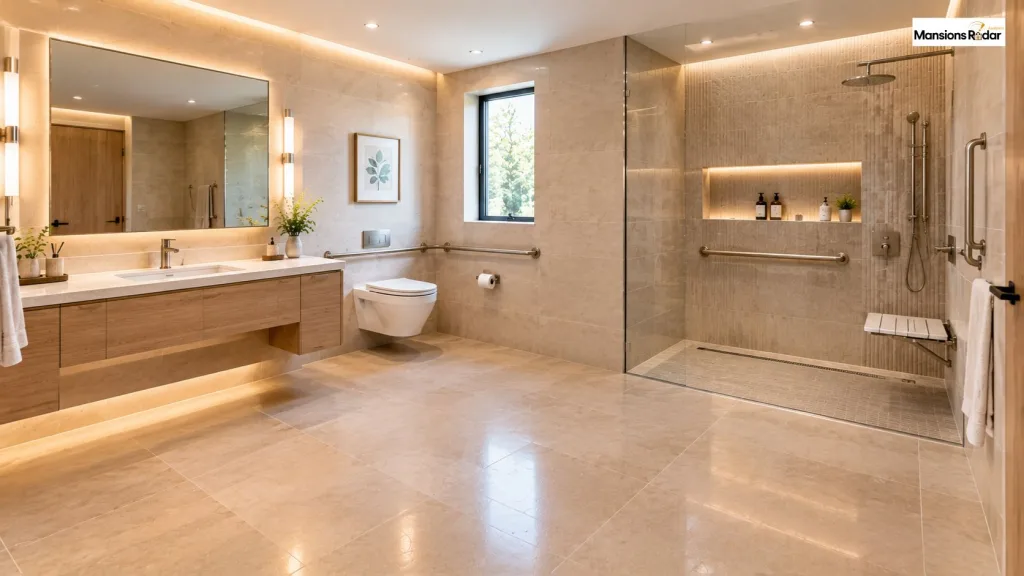
Best for: Medium-sized bathrooms with an L-shaped floor plan.
Tip: Never place a corner cabinet in the inside angle of the L. It blocks the turning space that makes this layout work.
9. ADA Bathroom Layout With a Shower Bench
Build the bench into the shower side wall during construction. Keep the bench depth between 15 and 16 inches and the seat height between 17 and 19 inches. Use a fold-down bench in smaller showers to keep the floor open when not in use.
Position the handheld showerhead within easy reach of the bench without leaning or stretching. Keep the 30-by-48-inch clear floor space at the shower entry intact.
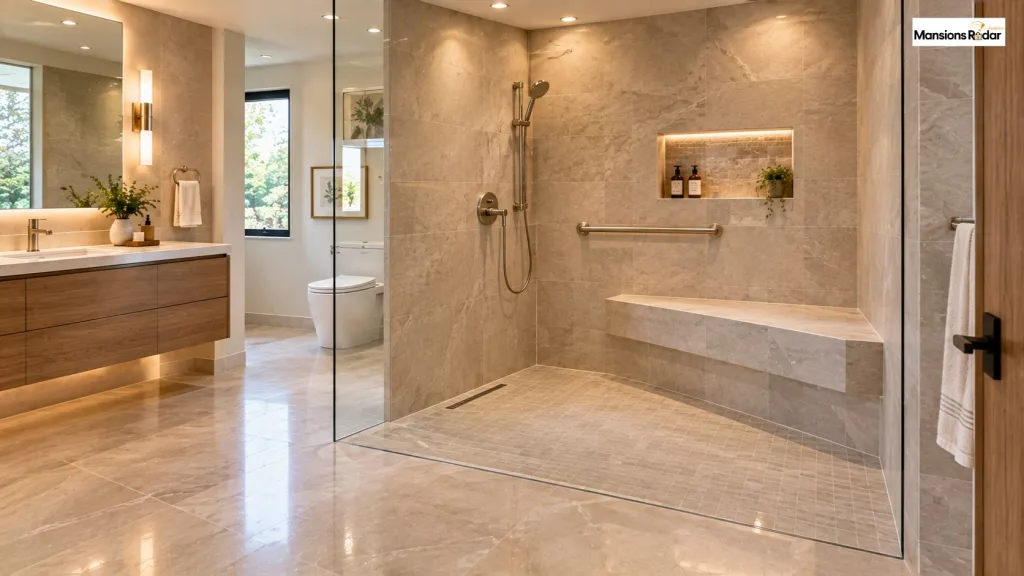
Best for: People who need seated showering or additional stability during bathing.
Tip: Use fully waterproof construction for the bench framing, substrate, and tile surface.
10. Modern ADA Bathroom Layout With a Double Vanity
Position the double vanity along the dry-zone wall. Leave at least 30 inches between the counter edge and the opposite wall for front wheelchair approach. Make at least one sink accessible with knee clearance, lever faucets, and a lowered counter between 34 and 36 inches.
Place the mirror bottom edge no higher than 40 inches above the floor. Keep a 30-by-48-inch clear floor space in front of each accessible sink.
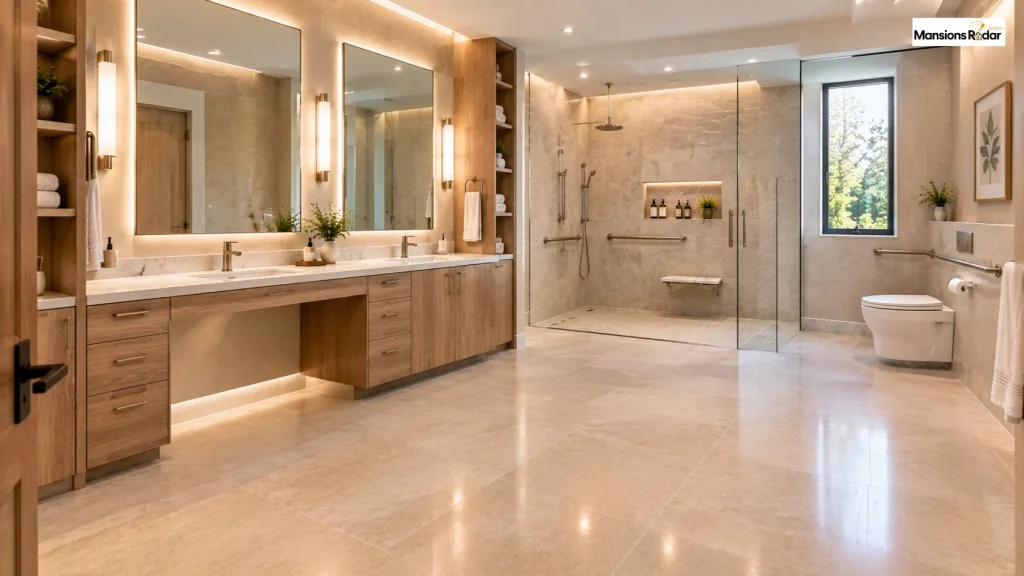
Best for: Shared primary bathrooms with enough usable floor space for a double vanity.
Tip: Separate storage on each side of the double vanity so neither user blocks the other’s access zone.
ADA Bathroom Layout Dimensions to Consider
Verify all measurements against the applicable accessibility standard and your exact floor plan before any construction begins. Local building codes may require additional clearances above these guidelines.
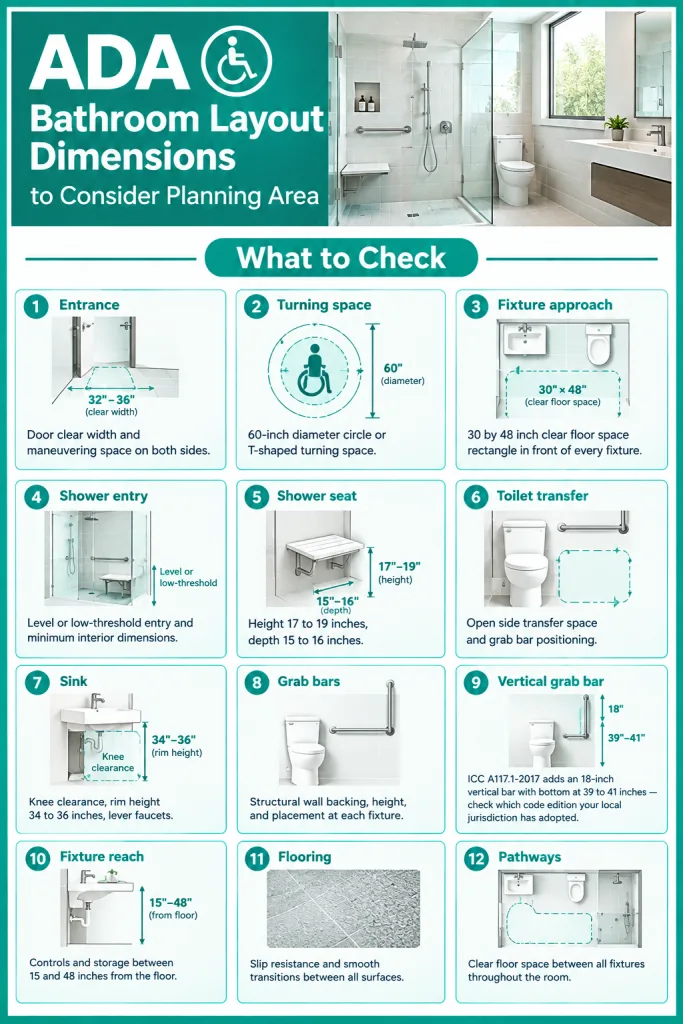
Always confirm with a licensed contractor and your local building department before finalizing any accessible layout.
ADA Bathroom Layout vs. Universal Bathroom Design
| ADA-Focused Planning | Universal Bathroom Design |
| Follows specific accessibility standards | Makes the space comfortable for a wide range of users |
| Applies primarily to public and commercial settings | Used frequently in private residential design |
| Uses defined technical requirements | Focuses on flexibility, comfort, and long-term usability |
| May require formal compliance checks | Includes accessible features without formal ADA compliance |
In 2026, the strongest accessible bathroom designs follow universal design principles. Three specific trends are shaping how these bathrooms look and feel this year.
- Non Clinical Style: Modern accessible bathrooms feel warm, stylish, and personal instead of looking medical.
- High Contrast Details: Dark grab bars, contrasting floor edges, and clear fixture finishes improve visibility for people with low vision.
- Wood Tone Grab Bars: Wood tone grab bars blend with the bathroom design while providing useful support.
- Smart Fixtures: Sensor faucets, hands free soap dispensers, and voice controlled lights make daily tasks easier for people with limited hand strength.
How to Make a Small Bathroom More Accessible
- Replace a floor-standing vanity with a compact wall-mounted unit to open the floor
- Install a sliding or outward-opening door to eliminate inward swing clearance problems
- Use a curbless shower entry to remove the most common trip hazard in the bathroom
- Maintain a 30 by 48 inch clear floor space rectangle in front of every fixture
- Keep the central route from the door to each fixture completely clear
- Add brighter, even lighting to reduce shadows near the shower entry and toilet
- Choose high-contrast finishes on fixture edges for better visual clarity
- Keep everyday items within the 15 to 48 inch reach range
- Avoid loose rugs anywhere on the bathroom floor
- Mount grab bars beside the toilet and shower even in a compact space
Common ADA Bathroom Layout Mistakes to Avoid
- Placing fixtures too close together leaves no usable transfer space and makes the layout fail in daily use.
- Blocking the entrance with a vanity forces an angled approach that a wheelchair cannot manage without repositioning.
- Choosing a door that swings inward reduces clear maneuvering space and creates a daily obstacle during transfer.
- Installing a shower curb above half an inch creates a trip hazard for ambulatory users and a barrier for wheelchair users.
- Using slippery flooring in wet zones creates serious fall risk. Choose tile rated R10 or higher throughout all wet areas.
- Adding grab bars without structural wall backing creates a false sense of security. A bar that pulls from the wall under load causes falls rather than preventing them.
- Placing controls too far from the user forces dangerous leaning and reaching during transfer. Keep everything within 15 to 48 inches from the floor.
- Ignoring drainage and waterproofing in a curbless shower causes water damage behind walls within months of installation.
- Relying on generic measurements without verifying local code leads to layouts that miss jurisdiction-specific requirements, including the ICC A117.1 vertical grab bar addition.
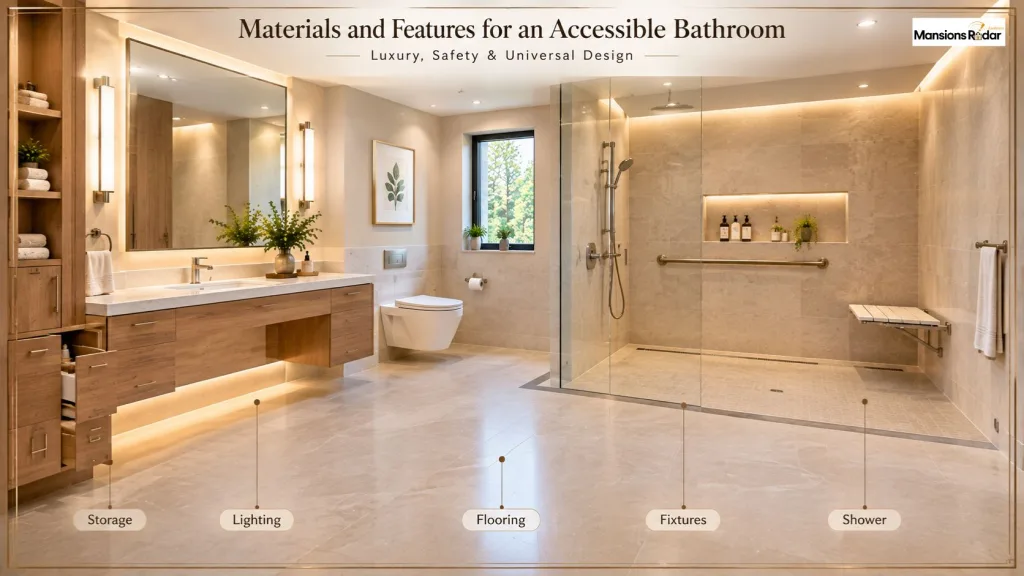
Materials and Features for an Accessible Bathroom
Flooring
- Slip-resistant porcelain tile with R10 or higher rating throughout all wet zones
- Smooth flush transitions between all flooring surfaces with no raised edges
- High-contrast border tile at the shower entry edge for visual accessibility
- No loose rugs anywhere in the bathroom
Showers
- Curbless or roll-in entry with no threshold above half an inch
- Handheld showerhead on a vertical sliding bar for users at any height
- Fold-down or built-in bench with waterproof construction at 17 to 19 inches height
Fixtures
- Lever-style faucet handles throughout — no grip-and-turn knobs
- Smart sensor-activated faucets for users with limited hand strength or dexterity
- Wall-hung toilet adjustable to any height during installation
- Wood-tone or brushed finish grab bars that blend into the overall design
Storage
- Recessed shower niches built into the wall during construction
- Pull-out vanity drawers rather than cabinet doors for full-depth access
- Open shelving within the 15 to 48 inch reach range only
Lighting
- Even overhead lighting with no dark zones near the shower or toilet
- Vanity lighting at eye level beside or above the mirror
- Night light near the floor at the bathroom entrance for low-light safety
- Reduced-glare diffused bulbs on wet tile surfaces
How Much Does an ADA Bathroom Remodel Cost
Costs vary by location, bathroom size, material choices, and the scope of accessibility work required. These are typical starting ranges for common project types in the United States based on industry data. Always get a written itemized quote before committing to any scope of work.
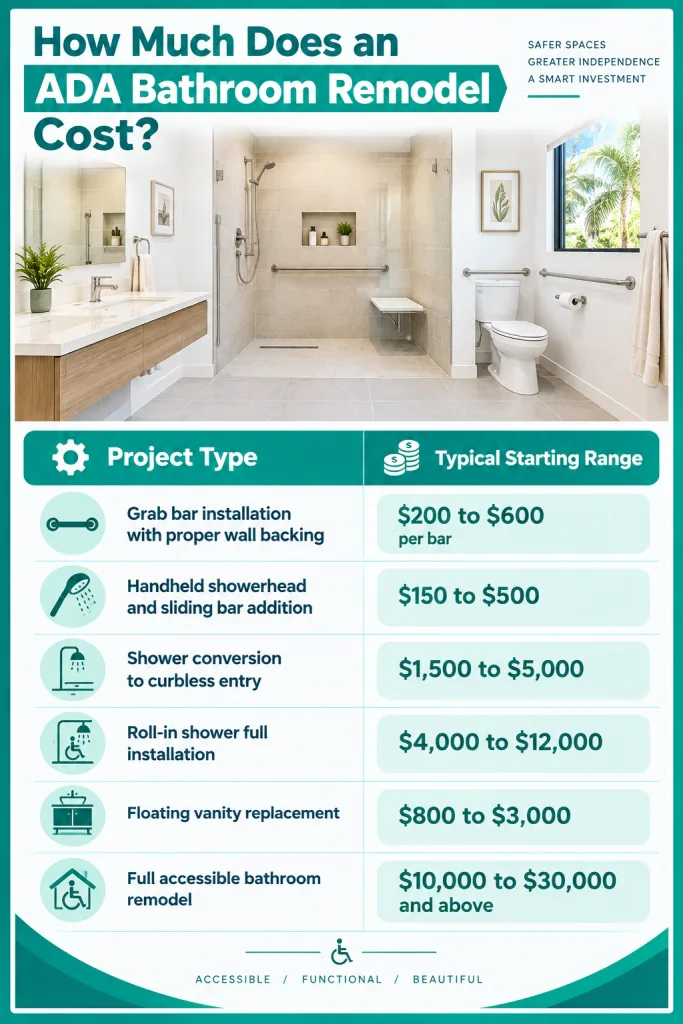
Keeping fixtures near existing plumbing reduces both labor time and material cost significantly. Moving a drain or supply line adds cost to any project regardless of size. Structural changes like widening a doorway or adding wall backing for grab bars also add to the total.
Planning an ADA Bathroom Renovation
- Measure the existing bathroom, including length, width, ceiling height, and door width.
- Identify the user’s specific mobility and access needs before choosing any fixture.
- Mark every door, window, plumbing connection, and structural wall on the floor plan.
- Plan fixture locations starting with the shower, then the toilet, then the vanity.
- Confirm the 60-inch turning circle and 30-by-48-inch approach rectangles fit in the open floor area.
- Choose accessible fixtures including a curbless shower, lever faucets, a floating vanity, and structural grab bar backing.
- Check local building code requirements, including which ICC edition your jurisdiction has adopted.
- Consult a qualified accessible design contractor before any construction begins.
- Obtain all required permits for plumbing, electrical, and structural work.
- Review the final floor plan with the contractor before demolition starts.
Final Thoughts
A good ADA bathroom layout starts with easy movement. Plan the entry, toilet, sink, shower, and open floor space before choosing finishes. Think about the user’s needs today and in the future.
A smart layout can feel open, comfortable, and welcoming while supporting accessibility. Before remodeling, check local codes and accessibility requirements to make sure your plan works well.
For design principles that apply across accessible and standard bathrooms, the layered design and storage guide on MansionsRadar covers practical approaches for every room type.
Frequently Asked Questions
What makes a bathroom wheelchair accessible?
The bathroom needs enough open space for movement, easy access to the toilet and sink, and a shower that does not require stepping over a high edge.
Can a small bathroom have an ADA friendly layout?
Yes. A sliding door, wall mounted vanity, curbless shower, and smart fixture placement can make a small bathroom easier to use.
What is the best shower for an accessible bathroom?
A curbless or roll in shower is a practical choice. Add a shower seat, handheld showerhead, reachable controls, and grab bars when needed.
Should an ADA bathroom door open in or out?
An outward opening or sliding door can work well because it keeps more floor space available inside the bathroom. The layout should still provide proper entry clearance.
Are grab bars necessary in an accessible bathroom?
They can provide useful support near the toilet, shower, and tub. Install them securely and place them where the user needs support.
Can I include a bathtub in an ADA bathroom?
Yes. A walk-in tub can make entry easier. Make sure there is enough space around the tub for safe access and movement.
What type of flooring is best for an accessible bathroom?
Choose flooring with good traction when wet and smooth transitions between surfaces. Avoid loose rugs and raised edges that can create trip hazards.
How can I make a bathroom safer for older adults?
Use good lighting, grab bars, a curbless shower, and a shower seat. Keep everyday items easy to reach and remove obstacles from walking paths.
Does an accessible home bathroom have to meet ADA standards?
Not usually. The ADA mainly applies to covered public and commercial facilities. Private homes generally follow local building codes, while ADA principles can still guide accessible design.